
The proliferation of Full Colour Graphics Displays with Touch
There are very few embedded designs on the market today that do not have a display. Even many consumer white goods and kitchen appliances incorporate some form of display. Buttons, rotary selectors, switches and other input devices are being replaced by more colourful and easier-to-use touch screen displays in industrial machines, thermostats, drink dispensers, 3D printers, commercial applications – virtually any electronic application.
Undoubtedly, this trend has greatly been accelerated over the past decade by the adoption of the smartphone and the emergence of tablet computers. Users of electronic devices have come to expect an intuitive graphical user interface (GUI) with touch control to interact with the device. Touch displays add a more aesthetically pleasing look and intuitive interaction to a wide variety of commercial and industrial products. This explosive adoption is reflected in recent forecasts for touch screen modules, which is expected to exceed $110bn by 2027.
As a result, an increasing number of designers and manufacturers are feeling the pressure to design a display into their new devices or to upgrade their existing devices by replacing physical buttons with graphic displays with touch. Often, this task is easier said than done. Particularly for smaller organisations that are specialised in single core applications, like coffee machines, but lack the resources and know-how in the display department.
Learn more about how 4D Systems helped CEiiA quickly develop a ventilator with a full color graphics interface with touch in the fight against COVID-19 using a 7.0″ gen4-HMI Display Module with Touch and 4D Workshop4 IDE.
Furthermore, as product development lifecycles are getting shorter and there is increased pressure on time-to-market, even larger organisations with seemingly unlimited resources are looking for easier, more flexible, and scalable display solutions for their applications.
Below an example of a drink dispenser where mechanical buttons have been replaced with a full colour touch screen display.

Image 1: Stiegl / Drink Modul – drink dispenser with mechanical buttons.
Image 2: Stiegl / Drink Modul – drink dispenser with mechanical buttons replaced with full-colour touch screen displays.
In this upgrade implementation Stiegl used a 4.3″ Intelligent Display Module with Capacitive Touch and Integrated Bezel from 4D Systems’ gen4-HMI Series of Smart Display Modules in combination with 4D Workshop4 IDE enabling fast development times and swift time to market.
Module used: gen4-uLCD-43DCT-CLB
Software: 4D Workshop4 IDE
Two Approaches: Modular Solution vs. Discrete Design
Committing to the right LCD display solution for a product can be a difficult task. For the embedded designer, incorporating an LCD can be as demanding as the rest of the design. There are many things to consider when making the initial decisions on what kind of display to use.
Essentially, there are two routes to adding a display to a design – either by designing in a discrete LCM and developing all required libraries and software to drive the display (Discrete Design) or using an off-the-shelf Intelligent Display Module that is virtually ready to run out of box (Modular Solution).
Either of these two options have their benefits and drawbacks in terms of cost, flexibility, scalability, control of components, development time, and ease of development etc. Both options should be considered in detail in the initial planning phase.
For example, when looking purely at the cost of the bill of materials, discrete design may seem like the more attractive option when comparing it to the cost of a ready-made module. However, factoring in the development time and resources required of a discrete design vs. a ready-to-run module solution, the short and long-term cost benefit may be offset by the ease of use and speed at which development can be completed using a module.
Discrete Design Implementation
Consider an example where an existing application or device is upgraded to include a Graphical User Interface (GUI) with touch functionality. Essentially replacing physical buttons or other input devices with a touch panel.
Let’s imagine this existing application device is running on an 8-bit microcontroller (MCU) and is to be upgraded to have a full colour graphics display with a touch interface. While most MCU’s are capable of interfacing to an LCD through a driver that is either integrated into the MCU or the display, or using a discrete driver, the size and resolution of the display would be limited by the MCU’s resources. For instance, it may be possible for an 8-bit MCU to drive a two-line dot-matrix display, but it may not have the processing resources to drive anything larger.
To create an engaging, graphically-rich experience it will be necessary for the designer to add a significant amount of embedded software into the application, such as libraries and image files. Alone the development effort of simply having the LCD as an output device is already significant, but it gets even more complex when touch functionality is added, and the LCD is used as an input device.
A considerable amount of research and effort needs to be put into both, the hardware and software development when using this approach. Once the application development is complete and production is initiated, it is imperative to follow strict incoming quality control on displays. There is always the possibility that something has changed with the display without prior notification, which can cause line-down problems and require redevelopment or tweaking of the display drivers and a dedicated team of engineers may be required to fulfil this task.
Although developing a custom discrete design gives more complete control over the bill of materials, and cost, this comes with the added expense of increased engineering and development cost. It is also important to consider the development time required for the steps outlined above. It can take up to 6 months or longer to get to the point when the actual GUI can be developed once the lower-level design has been completed.
The added level of complexity in terms of the bill of materials can influence the long-term availability of the selected components. If one of the key components is discontinued, redevelopment of the GUI may be necessary and can cause extended and costly line-down delays. This in turn can result in extended delivery lead times of the end-user application and customer dissatisfaction.
Modular Design Implementation
The alternative approach to designing-in a display is to use an off-the-shelf Intelligent Display Module. Typically, modules of this type feature an industry standard interface such as I2C, SPI or UART for communications to the host. Some modules also include an embedded microcontroller that not only takes care of all the graphics elements but may also include a variety of I/O and other peripherals to potentially allow the module to run the entire target application.
Many modules are supported by a library of functions allowing relatively easy control from the host MCU. Some come with a fully-fledged Integrated Development Environment that integrates the design and construction of the GUI as part of the overall embedded design process. Some of these
IDE’s feature drag-and-drop ‘WYSIWYG’ style development workflows, enabling extremely fast prototyping and application development without the need to write any code.
Using the module approach has the benefit that all of the drivers, primitives and GUI functions have already been developed and tested. Also, the host MCU can offload all the display tasks to the module so that the host can dedicate all its resources to the main application.
This way engineers can focus on the actual GUI design without having to worry about the low-level development. Essentially, getting a jump start on the overall development and eliminating months of time spent on getting basic things setup.
There are various Intelligent Module Solutions available today. One such solution is available from 4D Systems in a variety of display modules of several sizes and touch options that are programmed using 4D Workshop4 Integrated Development Environment.
The gen4 Series HMI modules have been designed to work with almost any form of host MCU or processor. Even small low-pin-count devices. This is possible as all the interaction between the display module and the host takes place over a simple serial link which is supported by most MCU’s.

As can be seen from the above description, the process of integrating an Intelligent Display Module into an application is far simpler and straight forward when comparing it to the process of a discrete design. The display module removes all the lower level design requirements and developer can focus on developing the actual GUI and the core application. This allows prototypes to be ready within a couple of days, and the final application to be ready within a couple of weeks, thus radically reducing the time to market.
Additionally, the risks of having to re-develop the display solution in the medium run due to discontinued components is far lower with the modular solution as the module supplier takes on this task. In fact, with display modules that integrate a dedicated graphics processor this risk is eliminated altogether as the developed GUI will ‘travel’ with the processor and will not be affected by the display technology.
As an added bonus, modular solutions, like the one from 4D Systems, allow for scalability in the future as the newly developed GUI can easily be ported to various resolutions and display sizes with a few clicks of a button.
Cost Analysis – Discrete Design vs. Modular Design
Ultimately the decision of which design approach to take often boils down to simple cost analysis. While the decision-making process should be a managerial as well an engineering decision, oftentimes what seems attractive on paper, and bottom line, is what drives the decisions. In this regard, it is worth having a closer look at a possible cost analysis scenario to look at what the numbers say as well.
As an example, let’s examine a scenario where a 4.3” LCD Display with Capacitive Touch and Cover Glass is being designed into an existing application using each of the two approaches. We will use some hypothetical estimations for this exercise and this is meant for illustrative purposes only.
Design Specifications
- Annual requirement: 3000 pieces of end user application.
- Project lifetime: 2 years.
- Total volume required 6000 pieces.
- Delivery volume: 250 pieces per month.
Discrete Design
- Two Development Engineers required to make the development and design.
- Estimated Annual Salary Cost per engineer: 140,000 USD / year
- Development time required 6 month
- Development cost for 6 months: 140,000 USD
- Estimated unit cost of 4.3” LCD Display and peripherals: 39.00 USD
Modular Design:
- One Development Engineer required to make the design.
- Estimated Annual Salary cost for the engineer: 140,000 USD / year.
- Development time required 1 month
- Development cost for 1 month: 11,666 USD
- Estimated unit cost of 4.3” Intelligent Display Module: 59.50 USD

From this, we see that the Development Cost for Modules is significantly lower compared to the Development Cost of the Discrete Design. The total cost per unit for the first batch of 250 pieces is also significantly lower with the modular approach with 152.84 USD vs. 599.00 USD.
As the development cost of the discrete design is amortized over time the total cost per unit drops rapidly. However, in this example it takes up to 23 months, or total volume of 5,750 delivered units, until the two total cost lines meet at the top right-hand side of the chart.
From this we can conclude that choosing the modular solution at volumes below 6000 units is more cost effective than the discrete design. If all variables except the volume remained the same in this example, and the volume requirement was 10K units, the discrete design would be more cost effective. However, at higher volumes the module supplier would also be able to provide a more cost-effective price, which can potentially significantly reduce the cost advantage of a discrete design at higher volumes.
In the above example we are making some generalisations and looking at only the cost aspect of the two approaches. While it is very important to look at the cost, it is worth noting all the other benefits and drawbacks involved in either of the approaches.
Conclusion
From this, we see that the Development Cost for Modules is significantly lower compared to the Development Cost of the Discrete Design. The total cost per unit for the first batch of 250 pieces is also significantly lower with the modular approach with 152.84 USD vs. 599.00 USD.
As the development cost of the discrete design is amortized over time the total cost per unit drops rapidly. However, in this example it takes up to 23 months, or total volume of 5,750 delivered units, until the two total cost lines meet at the top right-hand side of the chart.
From this we can conclude that choosing the modular solution at volumes below 6000 units is more cost effective than the discrete design. If all variables except the volume remained the same in this example, and the volume requirement was 10K units, the discrete design would be more cost effective. However, at higher volumes the module supplier would also be able to provide a more cost-effective price, which can potentially significantly reduce the cost advantage of a discrete design at higher volumes.
In the above example we are making some generalisations and looking at only the cost aspect of the two approaches. While it is very important to look at the cost, it is worth noting all the other benefits and drawbacks involved in either of the approaches.
Table of contents
Subscribe to our newsletter
Latest Case Studies

This case study unveils a practical application of embedded innovation, highlighting the process and outcomes of upgrading legacy systems in a technology-focused product line. Through strategic technological integration, the project not only uplifted product performance but also markedly improved customer satisfaction levels. The subsequent pages delve into various strategic and operational enhancements made, providing readers with a nuanced understanding of the concrete impacts and subtleties involved in a real-world, engineer-led embedded innovation initiative. A testament to blending traditional systems with modern innovation.
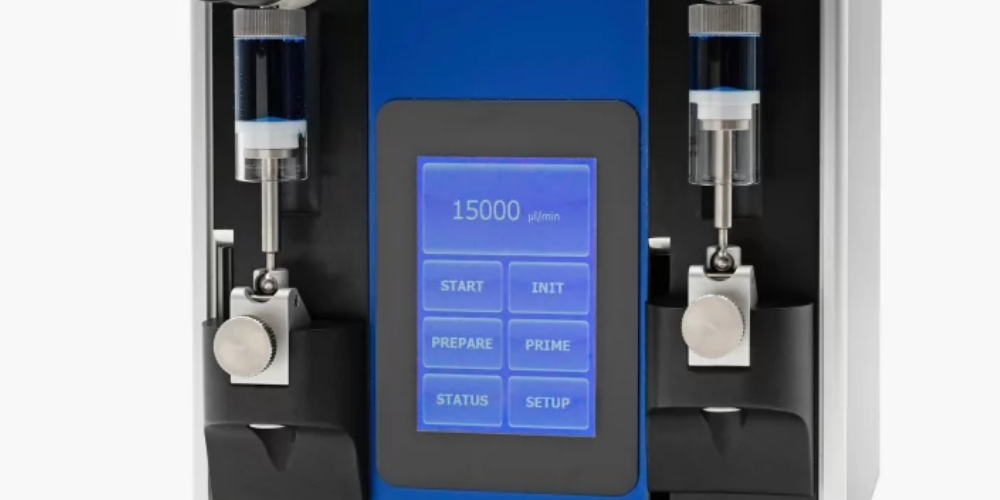
Duratec, specializing in liquid handling devices for various industries, aimed to simplify the control interfaces of their new product line. Partnering with 4D Systems, they integrated a touch display module enhancing user-centricity and operational efficiency. This transition replaced outdated control panels with an intuitive, modern interface without compromising on control capabilities via the RS232 interface. Three new devices were launched, improving user interactions through user-friendly touch displays, showcasing Duratec's commitment to innovation. This collaboration allowed for more straightforward control, monitoring, and interaction with Duratec's devices, ensuring a better user experience and meeting industry demands.

In the challenging process of creating an advanced 3D printer, BCN3D encountered an unexpected difficulty: finding an appropriate, user-friendly display module. Despite initial struggles, BCN3D discovered the solution in 4D Systems’ gen4 display modules. These modules offered superior resolution, processing power, and flexibility. Key to BCN3D's decision was the modules' easy integration via a serial connection and the Arduino-compatible library into their firmware. For its Sigma R17 3D printer, BCN3D upgraded to the gen4-ULCD-35DCT-CLB, a 3.5-inch Intelligent TFT-LCD display module with capacitive touch, further enhancing the user experience. The gen4 series of intelligent display modules perfectly matched BCN3D's requirements, offering innovative solutions in the sophisticated 3D printing space.